Hunting for a paperclip to open a SIM tray is frustrating. It is like searching for a needle in a haystack. Even worse, you will probably lose that tiny piece of plastic in a seat cushion.
Thankfully, switching to an eSIM on iPhone is much easier. You do not have to find decent airport coffee or wrestle with physical cards during a layover.
You can swap your data source directly in your device settings. This keeps your primary number active while using a secondary line for travel or business.
This guide helps you complete the iPhone eSIM setup process. You can bypass the plastic hassle entirely.
We will explore your eSIM iPhone settings to make your life easier. This step ensures more reliable connectivity. Here is a quick visual guide to help you start the transition
Let’s look at the specific steps to toggle your data and manage your digital lines without any hardware headaches.
Why Switch Mobile Data to eSIM on iPhone?
Think of the eSIM as a tiny digital resident inside your phone. It does not need a physical key to enter. The era of fumbling with metallic trays and plastic chips is finally ending.
For years, we feared dropping a nano-SIM into a dark carpet. Swapping carriers on a crowded train was even worse. This technology removes the physical friction of staying connected.
Your device becomes a flexible hub. You can download a new data profile over the air like a fresh playlist. It is built for those who value time and sanity. It provides a clutter-free way to manage your connection.
Avoid expensive international roaming charges
Coming home to a massive phone bill is a classic travel horror story. Nobody wants to experience that. You spend a week eating gelato in Rome. Later, you find out each photo upload cost as much as a local appetizer.
This “bill shock” happens for a simple reason. Domestic carriers charge astronomical rates for every megabyte used abroad.
Moving your mobile data to a secondary digital line changes everything. You effectively build a firewall against those sneaky fees.

When you use an esim iphone, you tell your primary carrier to take a back seat for data while you cruise on a specialized plan. This switch ensures your home provider isn’t the one billing you for your Google Maps usage or Spotify streaming. You can find more ways to beat rip-off data roaming charges abroad to keep your bank account intact during your travels. It’s a simple change in settings that provides massive peace of mind.
Use local data plans while traveling
Using a local digital plan feels like having a secret pass to the internet that the locals use. You get the same speeds and prices as someone who lives in the country without having to sign any long-term contracts. It’s the ultimate freedom for anyone who hates being tethered to expensive “travel passes” offered by big corporate providers.
Setting this up is surprisingly quick, and you can even get your free esim now to see just how straightforward the process is. Instead of hunting for a kiosk at the airport, you browse and buy a plan from your hotel bed or the taxi queue.
- You get local rates without the “tourist tax” prices.
- The connection is often faster since it’s native to the region.
- You can buy data on the fly as your needs change.
Keep your primary phone number active
The real magic of the Dual SIM setup is that your primary phone number stays alive even while you’re using cheap data for Instagram. Your mom can still call you to check if you’re eating enough, and those vital two-factor authentication texts for your banking apps will still land in your inbox. Your iPhone manages both lines at once, displaying two different signal bars at the top of your screen.
This means you don’t have to choose between saving money and staying reachable. You can follow a T-Mobile eSIM iPhone activation guide to see how domestic lines coexist with other profiles. It’s the perfect balance for digital nomads who need to remain professional while exploring a new city. You get the best of both worlds: local data prices and your familiar home identity all in one device.
What You Need Before Switching Mobile Data to eSIM
Before you start poking around in your settings like a digital explorer, you need to make sure your gear is actually ready for the journey. It’s much like checking for your passport before heading to the terminal; you don’t want to realize something is missing when you’re already in line. Preparing your device now saves you from those annoying error messages that pop up just when you need a connection the most.
Confirm your iPhone supports eSIM
Your phone needs to be part of the cool kids’ club to use this technology. Because Apple introduced this feature back in 2018, most modern devices are already invited. If you are rocking an iPhone XS, XS Max, XR, or anything released after those legendary pioneers, you are good to go.

If you are unsure about your specific model, you can quickly check if your iPhone supports eSIM to verify your hardware. Some older favorites like the iPhone 7 or 8 simply don’t have the internal magic required to host a digital SIM. Knowing your tech specs upfront prevents a lot of head-scratching later on.
Make sure your eSIM is installed
You can’t switch your data to a ghost. Before you can toggle your mobile data over to a new plan, that plan must actually live on your device. It sounds obvious, but skipping the installation phase is a common stumble for many first-timers.
Think of it like trying to change the channel on a TV that hasn’t been plugged in yet. You must follow the provider’s instructions to download the profile via a QR code or their official app. Once the “Cellular Plan” appears in your settings menu, you officially have something to switch to. If you are still looking for a plan, you can get your free esim now to get the ball rolling.
Check that your iPhone is carrier unlocked
A locked phone is like a jealous partner; it doesn’t want you seeing other networks. If you bought your phone through a specific carrier on a payment plan, they might have a digital padlock on it. This lock prevents you from adding a second line from a different company, which is a major buzzkill for travel.
You can easily find out your status by going to Settings, then General, and finally About. Look for the “Carrier Lock” section. If you see “No SIM restrictions,” you are in the clear to add any plan you like. If it says it’s restricted, you should check Apple’s guidance on how to unlock your iPhone before trying to swap your data.
Connect to Wi-Fi if needed
Setting up the internet sometimes requires having the internet already. It’s a bit of a classic “chicken and egg” situation that can leave you stranded if you aren’t prepared. Your iPhone needs a solid connection to talk to the carrier’s servers and verify your new digital credentials.
Trying to activate a new data line while standing in a dead zone is a recipe for frustration. Most people find that their hotel Wi-Fi or a cozy cafe connection works best for this initial handshake. Here is a quick checklist to ensure your environment is ready for the switch:
- Ensure your Wi-Fi signal is steady and not dropping out.
- Turn off any aggressive VPNs that might interfere with the activation server.
- Keep your battery life above 50% or stay plugged into a charger.
- Have your QR code or activation details ready on a second screen or printed out.
How to Switch Mobile Data to eSIM on iPhone
Switching your primary data source is the digital equivalent of changing lanes on a highway; you want to do it fast without causing a pileup. Your iPhone is built specifically to handle these quick maneuvers, so you can stop worrying about accidental roaming. The beauty of the modern system is that you don’t need to shut down your phone or look for a tiny tool to make the change happen. It’s all tucked away in the software, ready for you to flip the switch whenever you cross a border or need a fresh signal.
Open Cellular Settings
Everything starts with that familiar gray gear icon on your home screen. You need to jump into the heart of your phone’s communication center to see all your active plans. Tap on Settings and scroll down until you spot the Cellular option; if you live in the UK or Australia, it might be labeled as Mobile Data.
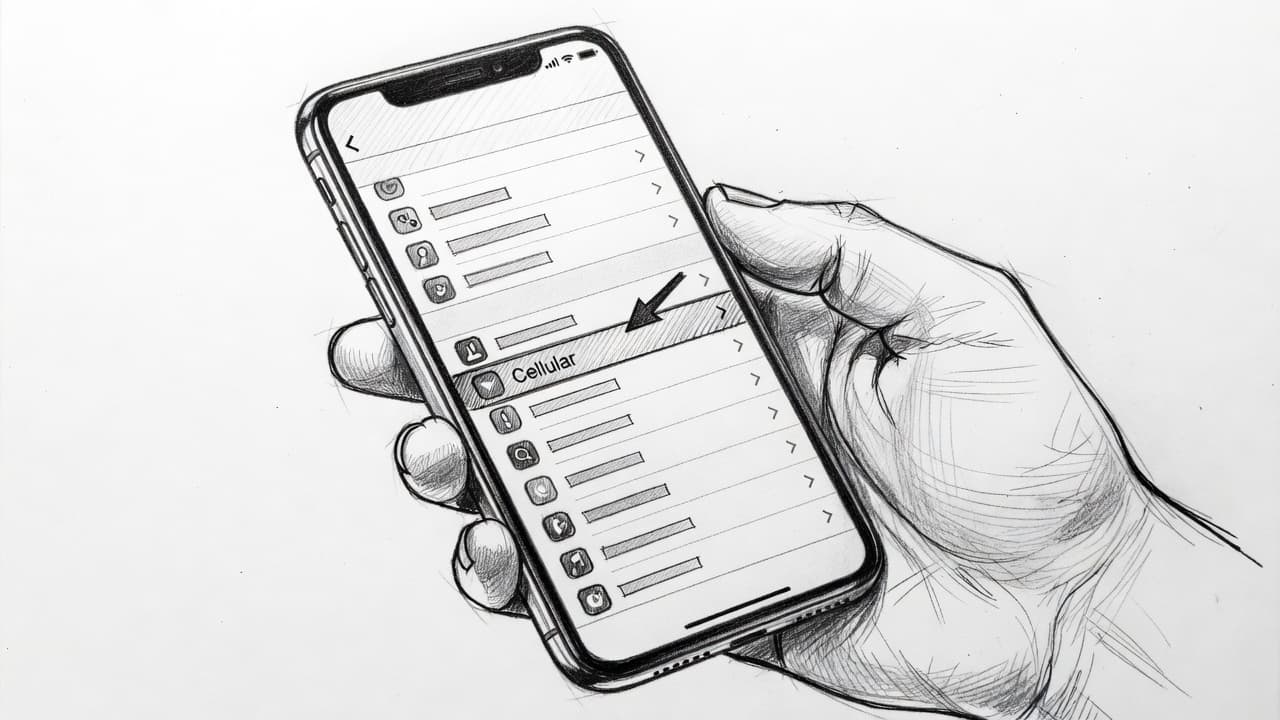
This menu is where your device keeps track of every digital and physical SIM you have loaded. If you are using a newer model, you might even see the iPhone 16 dual eSIM capabilities in action with multiple profiles waiting for their turn. Once you are in this menu, you can see exactly which line is currently doing the heavy lifting for your internet needs.
Tap Cellular Data
At the very top of the Cellular screen, you’ll find a row that clearly states which line is currently active. This is the master switch that tells your iPhone which carrier should handle your browsing, streaming, and map navigation. Tap on this row to open up the specific selection screen.
You can think of this as the bridge between your expensive home plan and your affordable travel data. If you’ve encountered issues before, knowing how to reset eSIM on iPhone can be a lifesaver if this menu doesn’t behave. Making sure you are on the right screen here ensures that your phone knows exactly which pipe to use for the internet.
Select Your Travel eSIM
Now you’ll see a list of your available lines, usually labeled with names like “Primary,” “Travel,” or perhaps a custom name you chose earlier. This is your moment to shine; simply tap the name of the eSIM you want to use for data.
To help you distinguish between your lines, your phone often provides useful labels:
- Primary: Usually your home number and main data plan.
- Secondary: Common for travel plans or work lines.
- Business: A specialized label for professional use.
- Travel: The perfect tag for your holiday data.
If you don’t have a secondary line showing up yet, you should get your free esim now to populate this list. Choosing the correct line here tells the phone to stop pinging your home towers and start using the local ones instead.
Confirm the Data Line Change
Once you tap your selection, a small blue checkmark will hop over to the new line. Don’t worry, your phone won’t explode; it’s simply redirecting the data traffic. You might see your signal bars at the top of the screen flicker for a second as the hand-off happens.
Apple makes this process incredibly forgiving. You can always check the official Apple guide on changing cellular data settings if you want to verify the technical details. Just look for that checkmark to stay put on your travel line, and you’ll know you’ve successfully avoided those nasty roaming fees.
Test Your Mobile Data connection
The final step is the most rewarding one because it proves everything is working. Swipe down from the top right corner to open your Control Center and turn off the Wi-Fi icon. Now, open your browser and try to load a fun website; maybe a local news site or a weather map of your destination.
If the page loads without a hitch, you are officially connected to the local network. You can now use your maps to find the best tacos in town without fearing a bill at the end of the month. If something feels off, simply toggle Airplane Mode on and off to give the connection a quick kick-start. This simple test is the best way to ensure you have truly entered the world of stress-free travel connectivity.
Best eSIM Settings for International Travel
Configuring your phone for a trip is like packing your suitcase. If you throw everything in randomly, you’ll end up with a mess or a broken zipper. Your phone settings need that same focused attention so you don’t return to a mountain of debt. It’s not just about turning a line on; it’s about making sure your device knows who’s in charge of the data and who’s on a strict timeout. Once you master these few toggles, you can walk off the plane with the confidence of a seasoned traveler who actually knows where they’re going.
Turn On Data Roaming for the eSIM
It might feel wrong to hit a button that says “roaming” when you’ve spent years fearing it like a monster under the bed. For your travel line, however, roaming is the secret sauce that makes the whole thing work. Most travel plans use a network provided by a localized partner, which means your phone technically considers that connection to be roaming.

If you leave this turned off, you’ll have full bars but zero internet, which is a special kind of digital torture. You must flip this switch to tell your phone it has permission to use the local towers. Some users on Reddit’s travel community suggest turning on data roaming is the most overlooked step for new users. Just remember you are giving permission to the cheap line, not your expensive home one.
Turn Off Roaming on Your Primary SIM
This is the most critical step for your wallet. If you forget this, your home carrier will happily charge you for every single background update your phone tries to pull while you’re sightseeing. Your primary SIM should stay active so people can text you, but its data privileges must be revoked immediately.
You can verify this by looking at your data options under the primary SIM tab. Turn that roaming toggle off and don’t look back. This acts as a digital leash, preventing your phone from wandering onto expensive airwaves. By doing this, you’re effectively telling your home plan to stay in its lane while the travel line does the heavy lifting.
Disable Allow Cellular Data Switching
iPhone has a feature that tries to be helpful by switching data lines if one signal gets weak. While this sounds great in theory, it’s a trap for travelers. If your travel eSIM signal blips for a second, your phone might “helpfully” switch back to your home line and start racking up charges.
You’ll find this toggle directly under the Cellular Data menu. Because it’s often on by default, you need to manually turn it off to stay safe. Keeping this disabled ensures your phone stays locked onto your affordable travel data no matter what. It puts you in total control of which network gets to spend your money.
Choose the Correct Default Voice Line
The beauty of a modern dual SIM setup is that you don’t have to give up your phone number just to use cheap data. You can set your primary line as the “Default Voice Line” so your iMessages and phone calls still come through as normal. This keeps you connected to friends and family without them ever knowing you’re halfway across the world.
Your phone handles this split-brain lifestyle with ease once you tell it what to do. You can get your free esim now to start practicing these settings before your next flight. Just follow the Apple cellular data roaming guide to make sure your voice and data lines are playing nice together. Here’s a quick summary of how to set your preferences:
- Set your home number as the Default Voice Line to keep your caller ID.
- Select your travel eSIM as the Cellular Data line to save money.
- Ensure iMessage and FaceTime are linked to your primary phone number.
- Double check that the data line is strictly the new travel profile.
How Mobile Data Works With Dual SIM on iPhone
Living the dual SIM lifestyle is like having a phone with a split personality, but in a productive and cool way. Your iPhone manages two separate connections to the cellular world at the exact same time. It uses a clever bit of tech called Dual SIM Dual Standby. This basically means both lines are awake and waiting for action, though they share the internal radio to get the job done. Because you aren’t swapping plastic chips in a dark airplane cabin, you can juggle a work line and a personal line without breaking a sweat.

When you look at your screen, you’ll see two sets of signal bars stacked like tiny digital pancakes. This visual confirms that your phone is talking to two different towers simultaneously. You can even see how many active eSIMs on iPhone your specific model can handle at once. It’s a powerhouse setup for anyone who needs to keep their home life and their travel adventures on separate billing statements.
Use eSIM for Data and Physical SIM for Calls
This is the ultimate “best of both worlds” configuration for the savvy traveler. You keep your physical SIM in its slot so your main number stays active for those important phone calls and security texts. Meanwhile, you point your phone scripts toward your digital line for all the heavy lifting like maps and social media. It’s a brilliant way to keep your identity consistent while paying local prices for your internet fix.
You don’t have to suffer through those awkward “who is this?” messages from friends because your primary caller ID remains unchanged. Your iPhone is smart enough to know that while Call A goes through the physical chip, Web Page B should load through the digital line. If you want to see this in action, you can watch a quick video on how to use Dual SIM on your iPhone to get a feel for the interface. You aren’t just saving money; you’re maintaining your reachability without the dreaded roaming fees.
Switch Between Data Lines Anytime
The greatest part of this digital setup is that you are the absolute boss of your bandwidth. You can hop between data lines faster than a tourist runs toward a free buffet. If your travel plan runs low on gigabytes or you find a spot where your home carrier actually has a better signal, you can swap back in seconds. There’s no need to restart your phone or wait for a carrier to “bless” the change.
Moving your data around is as simple as a few taps in your settings menu. This flexibility is perfect for people who move through different zones or need a backup line for work meetings. You can even get your free esim now and keep it stored on your device as a digital spare tire. Having this level of control means you never have to settle for a frustratingly slow connection when a better one is sitting right there in your pocket.
Why Mobile Data May Not Work After Switching to eSIM
Setting up a digital line is usually as smooth as a fresh jar of peanut butter, but technology loves to throw a curveball right when you’re trying to hail an Uber. You might notice that even after selecting the right line, your bars are missing or that spinning wheel of doom won’t disappear. It’s rarely a sign of a broken phone; usually, it’s just a digital handshake that hasn’t quite happened yet. Understanding these small hiccups allows you to get back to enjoying your trip without becoming the person frantically searching for local Wi-Fi.

No Signal After Switching
If you look at the top of your screen and see “No Service” or a lonely set of empty dots, don’t panic. This is often because your esim iphone is still trying to talk to a domestic tower that it can’t quite reach. The quickest way to force a fresh search is the classic Airplane Mode toggle. Swipe into your Control Center, tap the plane icon, wait about ten seconds, and tap it again. This forces the device to drop its current hunt and aggressively search for the local partner towers assigned to your new plan.
Sometimes a deeper nudge is necessary to clear the cobwebs from the software. You can troubleshoot eSIM activation problems by performing a full restart of your device. This isn’t just an old IT cliché; it actually resets the cellular modem and forces a fresh authentication with the network. You should also check that you haven’t manually locked your phone to a specific carrier in the settings. Setting the “Network Selection” toggle back to Automatic allows your phone to pick the strongest partner signal available in your current area.
- Toggle Airplane Mode on for ten seconds then off.
- Perform a hard restart by quickly pressing volume up, volume down, and holding the power button.
- Ensure Network Selection is set to Automatic in your cellular settings.
- If everything looks right, try to toggle the eSIM line off and then back on again to refresh the connection.
The eSIM Is Not Activated
A digital SIM isn’t always instant. It’s a bit like a new employee on their first day; they need a minute to get their ID badge working and find their desk. When you first install a plan, your phone might stay in an “Activating” state for several minutes while it trades credentials with servers halfway across the world. If you’ve been staring at a loading bar for over ten minutes, you might need to check if you’re actually in the right country. Many travel plans won’t finalize their activation until they ping a tower in the designated destination.
If you are already at your destination and nothing is happening, your APN settings might be the culprit. These “Access Point Names” are the secret passwords that allow your phone to enter the local internet highway. While most modern profiles set this automatically, some require a manual nudge. You can resolving cellular network connection errors by checking the specific APN details provided in your carrier’s installation email or app. If you still don’t have a plan to activate, you can get your free esim now and try the process again with a fresh profile. Most of the time, patience is your best friend during this initial handshake.
Common Mistakes When Using eSIM for Mobile Data
Installing a digital plan feels like a superpower until you realize you accidentally left the lights on and the meter is running. While the tech is brilliantly simple, it’s also incredibly easy to trip over your own digital laces if you aren’t careful. Many travelers fall into the same traps because they treat their digital line like a physical one, but the rules of engagement are different. Avoiding these blunders keeps your connection snappy and your budget exactly where you want it.

Activating the eSIM Too Early
Picture this: you’re sitting on your comfy sofa, three days before your flight to Tokyo, and you decide to get ahead of the game. You download your new digital plan and tap “Activate” because you love being organized. Your iPhone dutifully connects, and suddenly, your 10GB travel plan starts ticking down while you’re just scrolling through Netflix at home. By the time you land at Narita, half your data is gone because your phone used it for background updates while you were still packing your socks.
This is a classic rookie move that turns a great deal into a data drought. Most travel plans have a specific lifespan that starts the moment they touch a network, so waiting until you’re at the boarding gate or even landing is much smarter. If you jump the gun, you might end up needing to how to delete eSIM profiles or reset the whole mess just to get a fresh start. Use these tips to stay on the right side of your data limit:
- Only toggle the line to “On” once you are physically at the airport or arriving.
- Check the “validity period” in your plan details to see if it starts on purchase or first use.
- Keep the line disabled in your settings until you actually need the local signal.
Because the activation process can sometimes take a few minutes, some people panic and think it’s broken. However, it’s better to wait five minutes at your destination than to waste five days of your plan while you’re still in the US. You can watch a breakdown of common travel eSIM mistakes to see how others have accidentally burned through their data before their vacation even started. If you haven’t bought your plan yet, get your free esim now and remember to keep that activation finger steady until you see the destination’s skyline.
Frequently Asked Questions
Changing how your phone connects to the world might feel like a big leap, but it’s really just a few taps on a screen. You aren’t locking yourself into a digital cage just because you want cheaper data while munching on a croissant in Paris. Whether you’re a minimalist traveler or a business pro, getting answers to these common curiosities helps you move forward with confidence.
Can I switch back to my physical SIM later?
You aren’t making a blood pact with the digital gods when you move your data. If you decide that you miss the tactile feel of a physical card, you can absolutely go back to your old ways. Your iPhone is a flexible machine that doesn’t care if its instructions come from a piece of plastic or a snippet of code.

The transition back is usually simple, though it often requires a quick chat with your carrier to get a fresh card. Because your old physical SIM usually deactivates once you swap its number to a digital profile, you can’t just pop the old one back in and expect a signal. You can learn more about modernizing your connection or moving eSIM to another device if you are upgrading your hardware soon.
- You aren’t stuck with a digital profile forever.
- Carriers can issue a new physical SIM whenever you ask.
- Your phone hardware remains capable of reading plastic cards unless you have a US-bought iPhone 14 or newer.
- Moving back is a standard procedure that many people do after a long trip.
Most travelers find that once they experience the freedom of a digital line, they don’t look back at the physical tray. However, knowing you have an exit strategy is great for your peace of mind. Just contact your provider, and they’ll help you convert your profile back to a physical card so you can return to your preferred setup. If you haven’t even started your digital journey yet, you can get your free esim now and test the waters without any permanent commitment.
Final Thoughts
Switching your mobile data to an eSIM is the ultimate digital upgrade for any traveler. You get to keep your main number for calls while enjoying local internet rates that won’t drain your bank account. Because the process is entirely software-based, you can say goodbye to those tiny SIM tools and plastic chips forever.
Your phone is now a flexible travel companion ready for any border crossing. If things get tricky, just remember to check your roaming toggles and give your device a quick restart. You are officially in control of your data and your budget.
Now that your device is ready, it is time to focus on the fun parts of your journey. Grab your bags, keep your phone charged, and go explore the world with your reliable new connection. Safe travels and enjoy every gigabyte of your trip!
This post may contain affiliate links. If you make a purchase through these links, I may earn a small commission at no extra cost to you.