Imagine being deep in a national park with zero cell bars on your primary network. Instead of carrying two separate devices just to check your trail map, a single eSIM-compatible iPhone solves this connectivity issue completely.
Thanks to dual-SIM technology, your device can run a physical card and a digital data plan simultaneously. This feature keeps your home number active for important texts while utilizing a second network for cellular data. It’s a total lifesaver for campers who need reliable backup signals in remote areas. With a modern iPhone eSIM setup, you get affordable local data rates without losing touch on your primary line. Setting up this configuration before your next outdoor adventure ensures peace of mind and keeps you safely connected anywhere.
Most modern models support this dual setup perfectly. You should check if your iPhone is eSIM compatible before trying to add a second line. If you’re ready to get connected, you can get your free esim now to start testing the dual signal bars on your screen. Here is how you can manage both connections without any technical headaches.
How the Dual SIM Function Works on Your eSIM iPhone
Think of your iPhone as a house with two front doors. Instead of checking one door then running to the other, you are standing in the hallway where you can see both at the same time. This is essentially how the Dual SIM system handles your connections. Your phone manages a physical SIM card and a digital eSIM simultaneously, allowing two different cellular plans to live on a single device. You don’t need to carry two phones or constantly swap plastic cards with a paperclip. Your iPhone just keeps both lines humming in the background while you go about your day.
Active Standby: Never Miss a Call
Your device uses a technology called Dual SIM Dual Standby. This means both your primary home number and your travel or work line stay “awake” and ready for action. You don’t have to manually toggle a switch to see if someone texted your work number while you were using your personal one. Both lines are actively listening for incoming signals at all times. When a call comes in, your iPhone even tells you which “door” the caller is knocking on by displaying a small label, like “P” for primary or “T” for travel, right on the incoming call screen.

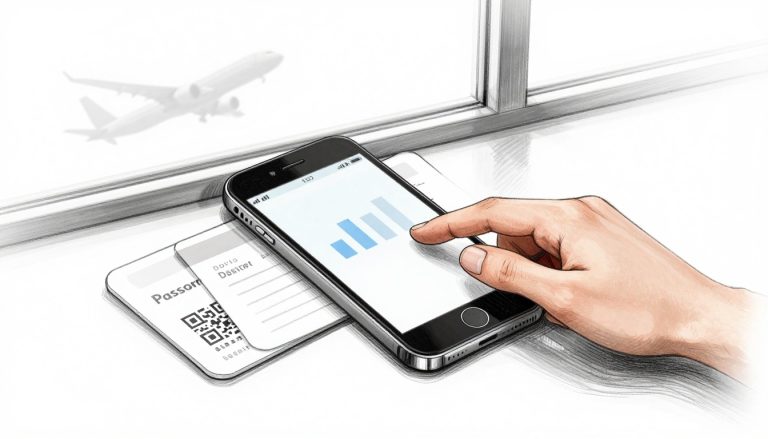
The status bar also changes to reflect this double life. Instead of one set of bars, you will see two distinct signal indicators stacked on each other. The top row usually shows the signal for your main line, while the bottom row tracks your secondary connection. According to Apple’s guidance on Dual SIM, both numbers can make and receive calls as long as you aren’t already mid-conversation. If you are chatting on one line, the other line will typically send incoming calls to voicemail because the phone can only process one active “voice path” at a time.
Choosing Your Cellular Data Path
While both lines can handle calls and texts together, cellular data usually follows a “one boss” rule. You have to designate which line is responsible for your internet juice, whether that’s for scrolling Instagram or navigating a new city. This is a huge win for travelers. You can keep your expensive home carrier active for emergency texts but set a regional plan to handle all the heavy lifting for maps and apps. If you’re looking for a simple way to test this out, you can Get your free esim now and assign it as your primary data path.
Managing this is quite simple in your settings menu. You can explicitly tell your iPhone which line should pay the “data bill” so you don’t accidentally rack up roaming charges on your primary account. Most people find that using dual eSIM on iPhone 16 makes this even smoother since everything is handled digitally.
- Primary Line: Great for keeping your iMessage and WhatsApp tied to your permanent number.
- Secondary Line: Perfect for cheap local data or a dedicated work number.
- Data Switching: An optional setting that lets the phone jump to the other line if your primary data provider has a weak signal.
This setup ensures you stay connected to the internet without losing touch with people back home. You get the best of both worlds without the headache of managing two physical devices.
Why Travelers and Campers Love the Dual SIM Setup
Traveling the world or hiking into the wild is all about freedom, but being disconnected can turn an adventure into a stressful mess. If you’ve ever stood in a foreign airport trying to figure out which plastic SIM card to buy while your home number is tucked away in a wallet, you know the struggle. The hybrid setup on an esim iphone changes the game because it lets you keep your digital life organized without the constant physical swapping. You can have the best local data rates while staying tethered to your life back home.
Keep Your Home Identity for Banking and Security
One of the biggest headaches of traveling is being locked out of your own money. Most banks use your phone number as a primary digital ID. When you try to log in from a new location, they send a secret code via SMS to verify it’s actually you. If you’ve replaced your home SIM with a local one, that code is floating in a digital void, and you’re stuck at a login screen.

Keeping your home SIM active in the physical slot while using a digital plan for data solves this since many modern banking apps are bound to your specific SIM identity… It’s a security safety net that ensures you never lose access to your funds. If you’re looking for a reliable data plan, you can check out Gohub eSIM for the best travel connectivity
Ditch Expensive Roaming and Triple Your Coverage
Roaming fees are the silent budget killers of any trip, often costing more than a nice dinner just for a few megabytes of data. By using a local plan on your esim iphone, you can bypass these predatory prices entirely. You essentially get to “shop like a local” for your data while your home line remains in standby mode for emergency calls.
- Keep your home line on for incoming texts which are often free even when abroad.
- Set your secondary digital plan as the primary source for all data usage.
- Check that you’ve followed the steps for activating eSIM on iPhone before you leave to ensure a smooth transition.
For the adventurous souls who prefer the backcountry, this setup is a total lifesaver for signal strength. If your main provider has a dead zone in a specific valley, your secondary line might have a tower just over the ridge. This gives you two different networks searching for a signal simultaneously. You can even get your free esim now to see how easy it is to add a second layer of connectivity to your device before your next big trek. Having that backup carrier means you’re much less likely to end up with a “No Service” warning when you actually need to check a map.
Step-by-Step: Setting Up Your eSIM iPhone for Dual Network Use
Setting up a dual connection on your phone is like teaching your device a new language. It might feel a bit intimidating at first, but your iPhone is built to handle this dance with grace. Once you finish the setup, you won’t need to fumble with a SIM card tool in a crowded airport ever again. Most people find that having both a physical card and a digital plan is the sweet spot for reliable service.

Insert Your Physical SIM Card
Start with the physical part of the equation by sliding your primary carrier’s card into the side of your phone. Use the little metal tool that came in the box; if you lost it, a sturdy paperclip usually does the trick. You want this to be your “anchor” line, the one that holds your main phone number. After you click the tray back into place, your phone should find the network bars within a few seconds.
Install Your Digital Profile
Now you can add the second layer of magic. Go to your settings and look for the cellular menu to add a new plan. Most providers will give you a QR code that you just scan with your camera. It’s essentially like downloading an app that gives you cell service. If you are using a major carrier like T-Mobile, you can follow a specific T-Mobile eSIM setup guide for iPhone to handle the activation digitally.
Label Your Connections
This is where things get organized. Your iPhone will ask you to name each line so you don’t get confused later. I suggest naming one “Primary” or “Home” and the other “Travel” or “Data”. This makes it incredibly easy to see exactly which line is ringing when someone calls you. You can even use custom labels if you want to be extra specific, like “Work” or “Europe Trip”.
Assign Your Cellular Data
Finally, you need to tell your phone who is in charge of the internet. Head back into the cellular data settings and select your new digital plan as the primary source. This ensures your phone uses the cheap data you just bought instead of eating up your expensive home roaming plan. To get a feel for how this works without spending a dime, you can Get your free esim now and run through these steps right away.
This configuration is a favorite among frequent flyers because it prevents those “sticker shock” bills. If you want to see how other travelers handle these settings, check out these tips on tech-related travel forums. You can toggle between your data sources at any time, giving you total control over your connectivity. For more specific details on how the system manages both networks simultaneously, check out the Gohub guide on how Dual SIM works on iPhone.
Rules for Dual SIM: Physical Cards vs. Pure eSIM
Keeping track of your phone hardware is like trying to remember which pocket you put your keys in; it gets confusing fast. Apple changed the rules of the game back in 2018, and since then, they’ve been slowly deleting physical parts of the phone. While the software works similarly across the board, the actual holes (or lack thereof) on the side of your device depend heavily on where you bought it.
Regional Differences: US vs. Global iPhone Models
If you picked up your phone in a shop in New York or Los Angeles, it is going to look and function a bit differently from a model bought in London or Tokyo. Apple decided to go “all in” on digital tech for the American market, meaning the hardware inside your pocket follows a specific set of rules based on its home country. Understanding these regional variations is crucial for international travelers and tech enthusiasts alike.
The US Shift to eSIM-Only Hardware
For the American market, Apple made a groundbreaking decision starting with the iPhone 14 series by completely removing the physical SIM card tray. US models rely entirely on digital eSIM profiles. This design choice maximizes internal space for other components, potentially improving battery layout or thermal management.
However, this means if you buy a device in the United States, you must ensure your carrier supports digital activation, as you will not be able to slide in a traditional nano-SIM card.
Global Models: Retaining the Physical SIM Slot
In contrast, iPhones sold in the rest of the world—including Europe, Asia, and Australia—still feature the familiar physical SIM card slot alongside eSIM capabilities. This dual-approach provides maximum flexibility for users who frequently swap physical plastic cards when crossing borders or changing local networks.
For many global consumers, having at least one physical slot remains a necessity due to local carrier limitations in their respective regions.
Key Technical Variations: mmWave 5G and Dual eSIMs
The structural differences extend beyond just the SIM tray. Here is what separates these regional devices under the hood:
Dual Physical SIMs: In specific markets like Mainland China, Hong Kong, and Macau, iPhones are manufactured with a unique tray that holds two physical nano-SIM cards, omitting eSIM functionality entirely due to local regulations.
mmWave 5G Antennas: US models feature a visible window on the side for mmWave 5G, offering ultra-fast speeds in dense urban areas. Most global models lack this specific hardware, relying instead on Sub-6GHz 5G networks.

U.S. models of the iPhone 14, 15, and 16 are purely digital. They don’t have a plastic card slot at all, so you’ll be using two digital plans if you want dual service. Meanwhile, the rest of the world still gets a little tray for a physical card alongside the digital option. It’s a bit of a hardware “choose your own adventure” situation.
| Region | Physical SIM Tray | eSIM Support |
|---|---|---|
| United States | No (eSIM Only) | Yes (Multiple) |
| China / Hong Kong | Yes (Two Slots) | Usually No |
| Rest of World | Yes (One Slot) | Yes |
This table shows that unless you are in the U.S. or China, you likely have the best of both worlds with one physical slot and one digital one. Travelers often prefer the global model because it allows them to grab a cheap plastic card from a street kiosk in a pinch. However, if you have a U.S. model, you can Get your free esim now to see how easy it is to bypass the lack of a tray.
The timeline for these features also matters, as older phones have different limits. You can see which type SIM your Check your iPhone settings or look for the tiny side pinhole to see your SIM options.
- iPhone XS through iPhone 13: These models have one physical slot. They also support one active digital line.
- iPhone 14 and 15 (US): These versions ditched the tray entirely. They rely 100% on digital profiles.
- iPhone 16: This model continues the digital-only trend for U.S. users. However, global versions keep the physical tray.
Are you upgrading from an older device? Check your iPhone’s eSIM compatibility before heading to the airport. Knowing your model’s limits prevents awkward moments. You won’t end up with a plastic card and nowhere to put it.
Digital nomads can also check out the Gohub breakdown of eSIM vs physical SIM cards. This guide helps you decide which setup fits your lifestyle best. Regardless of your hardware, the future is moving away from plastic cards..
Prevent Unexpected Roaming Charges: Crucial Settings Change
Nobody wants to return from a peaceful camping trip only to find a phone bill that costs more than the tent. When you run two lines, your iPhone tries to be helpful by hunting for the strongest signal it can find. If your travel data gets a bit spotty under some thick tree cover, your phone might get impatient. Without the right settings, it will sneakily jump back to your home line for a sip of expensive roaming data. You have to tell your device exactly how to behave to keep your wallet safe.
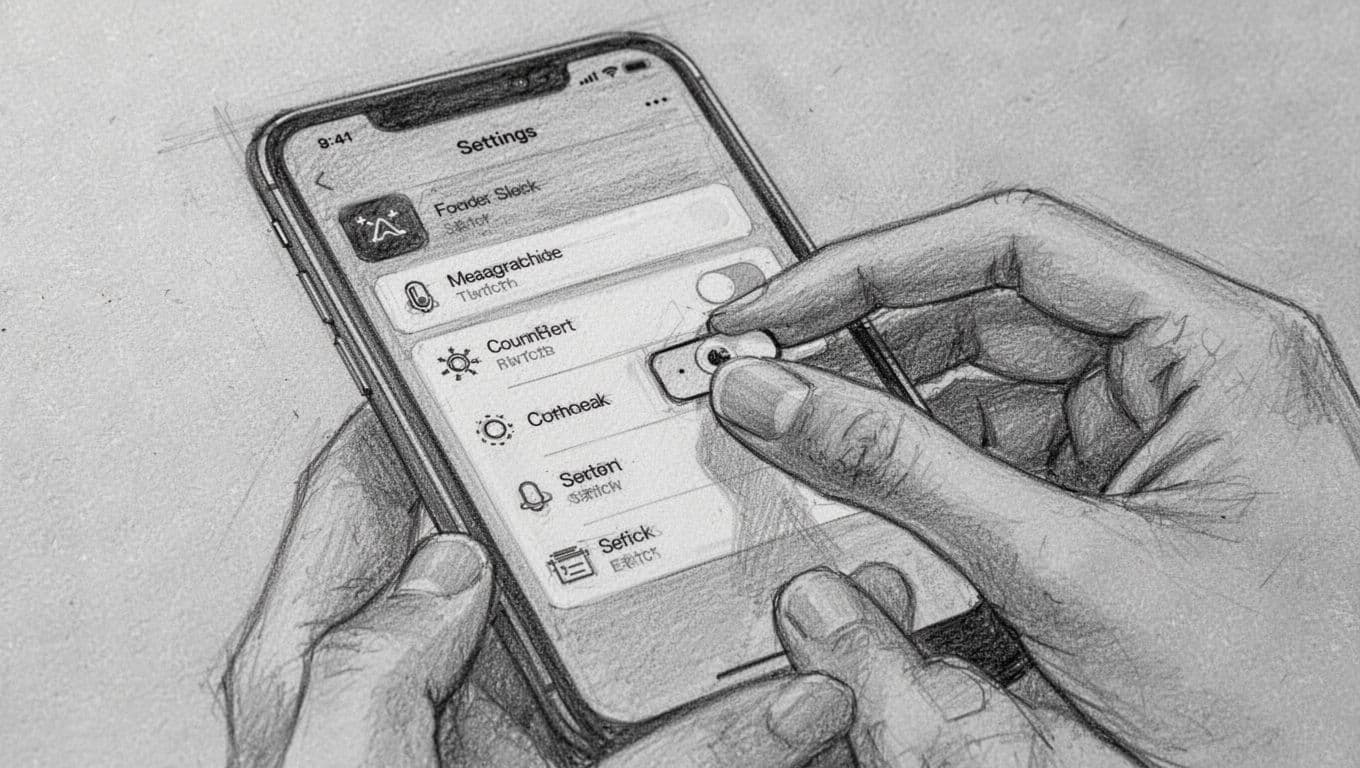
TThe Data Roaming Toggle Hack
The biggest secret to avoiding a roaming disaster is managing individual line toggles. Think of it as putting a padlock on your home account. Meanwhile, you leave the front door open for your travel plan.
You can set different rules for each SIM. This configuration ensures they do not step on each other’s toes. If you worry about your current setup, you can reset eSIM iPhone settings. This action clears out old configurations so you can start fresh.
Step-by-Step Configuration Guide
Follow these exact steps inside your iOS settings to lock down your lines properly:
1.Access Cellular Settings:Step 1.
Open your Settings app and tap on Cellular.
2.Lock Your Primary Line:Step 2.
Click on your Primary home line. Ensure the Data Roaming switch sits firmly in the OFF position.
3.Enable Travel Data:Step 3.
Go back and tap your Secondary travel line. Flip its Data Roaming switch to ON.
4.Block Automatic Switching:Step 4.
Navigate to the main Cellular Data menu. Locate the switch labeled Allow Cellular Data Switching and turn it OFF.
Why You Must Turn Off Cellular Data Switching
Disabling this feature essentially fires your phone’s internal roaming scout. Your phone will never make executive decisions on your behalf.
Even if your travel eSIM signal drops to a single bar, the phone cannot use your home line for internet. This setup creates the ultimate safety net for your bank account.
If you want to check these settings without risk, you can get your free activation profile now. Try toggling the data paths yourself to see how it behaves before your trip.
| Setting Name | Status for Home Line | Status for Travel Line |
|---|---|---|
| Cellular Data | Off | On (Selected) |
| Data Roaming | Off | On |
| Data Switching | Off | Off |
This table shows the safest configuration for any traveler or camper. The only small trade-off is that if you’re on a voice call on your primary line, your internet might take a nap until the call ends. Most people find this a tiny price to pay for Apple’s data roaming protections. It’s always better to have a temporary internet pause than a permanent bill shock when you get home. Keep these toggles in check and you can scroll through your hiking photos without any financial anxiety.
Prepare Your Device for Your Next Wilderness Escape
Stepping into the great outdoors is much more relaxing when you know your tech won’t abandon you at the first sight of a mountain range. While the goal is often to unplug, having a reliable connection is a massive safety net for navigation and emergencies. Preparing your device before you lose sight of the pavement ensures you spend more time looking at the view and less time staring at a “No Service” icon. A proactive approach to your settings can transform your phone from a paperweight into a multi-network survival tool.
Pre-Trip Digital Checklist
Success in the wild starts in your living room where the Wi-Fi is strong and the coffee is hot. You should handle all your heavy downloads and installations at least 24 hours before your departure. This includes getting your maps ready for offline use, as GPS still works even when cell towers are miles away. To get a head start on your connectivity, you can Get your free esim now and have it ready to toggle on the moment you hit the trailhead.
- Download Offline Maps: Open Google Maps while on Wi-Fi and save the entire area of your destination to avoid getting lost in dead zones.
- Save Essential Screenshots: Capture your booking confirmations, trail maps, and travel security best practices to access them without an active data link.
- Enable Wi-Fi Calling: This setting allows your phone to route calls through your secondary data plan if your home carrier signal vanishes.
- Update Your Software: New iOS updates often include modem improvements that help your phone grab onto weak signals in remote areas.

Battery Management for Dual Network Users
One quirk of the dual network life is that your battery has to work twice as hard to stay connected to two different towers. This is especially true in deep forests where your phone might engage in a power-hungry search for a better signal. You can mitigate this by manually turning off your primary home line if you know for a fact it has zero coverage in your campsite. This stops the constant searching and preserves your juice for photos and emergency coordinates.
If you find yourself running low on power, switching to Low Data Mode in your cellular settings stops background apps from eating up both your data and your battery. For those heading to specific locations like Japan or Thailand, a guide to using eSIM in Asian countries can offer localized tips on which carriers have the best rural coverage. Managing your hardware efficiently means you won’t be left with a dead phone when you finally reach the summit.
The Freedom of Full Connectivity
There is a certain magic in sitting by a campfire knowing you have two different networks keeping watch over your safety. By mastering the dual setup on your device, you are essentially building a bridge between the digital world and the wild one. You aren’t just carrying a phone; you’re carrying a redundant communication system that fits in your pocket. This setup gives you the freedom to explore further and stay longer without the nagging fear of being truly unreachable.
Whether you are navigating a tricky coastal trail or just sending a “made it” photo to your family, having a backup plan makes every adventure better. Now that your device is prepped and your lines are labeled, you are ready to trade the city lights for starlight. Go forth, stay connected, and let your phone handle the logistics while you handle the exploration.
Conclusion
Using a physical card and a digital plan together is the ultimate way to stay connected. Modern phone hardware makes it easy to balance a work line and a personal number without any mess. You get double the network coverage and none of the stress.
Setting up these two lines takes only a few minutes in your settings menu. This hybrid approach keeps your banking codes safe while giving you cheap data for your next trek. It’s a smart move for anyone who hates paying roaming fees or losing signal in the woods.
If you are ready to upgrade your connection, visit esimiphone.co to find the best data packages for your next trip. You can also Get your free esim now to see exactly how your phone handles dual signal bars today.
This post may contain affiliate links. If you make a purchase through these links, I may earn a small commission at no extra cost to you.