You are staring at four full bars of signal, yet your map won’t load and your messages are stuck on a spinning wheel. It is incredibly frustrating to see a perfect connection on your screen while your phone acts like it is in a lead basement. This happens because signal bars only show your physical connection to a cell tower, but they don’t guarantee that the tower is routing your data to the internet.
When your internet fails despite a strong signal, it is usually due to a routing error, a missing APN, or disabled roaming. Most esim iphone glitches can be solved by adjusting a few hidden toggles or performing a quick network refresh. If you are struggling with a travel line or a secondary data plan, you can often reset eSIM profile on iPhone to clear out these temporary software bugs.
We are going to walk through the exact steps to get your data flowing again. If you’ve just landed in a new country and things aren’t working, you might even want to get your free esim now to see if a fresh profile does the trick. Check out this quick video below for a visual guide on the most common fixes.
The first thing to check is whether your phone actually has permission to use the data it is receiving.
The Four Swift Moves to Unstick Your eSIM iPhone Connection
Sometimes your phone is like a car that’s idling perfectly but won’t shift into gear. You see the signal bars standing tall and proud; however, your data is essentially taking an unannounced nap. This disconnect usually boils down to a few small settings that got tangled during the handoff between networks.
If you’re in a massive rush because your Uber is waiting and your map won’t refresh, you might just need a fresh start. You can Get your free esim now if you suspect your current provider is giving you the cold shoulder. Otherwise, let’s look at the four quick adjustments that usually clear the digital pipes.
Updating the Cellular Data Path Selection
Your iPhone is a multitasking champion. However, it can get confused when juggling two different lines. When you add a new digital line, the phone does not automatically switch your internet data. You have to explicitly tell the hardware which network path to take.
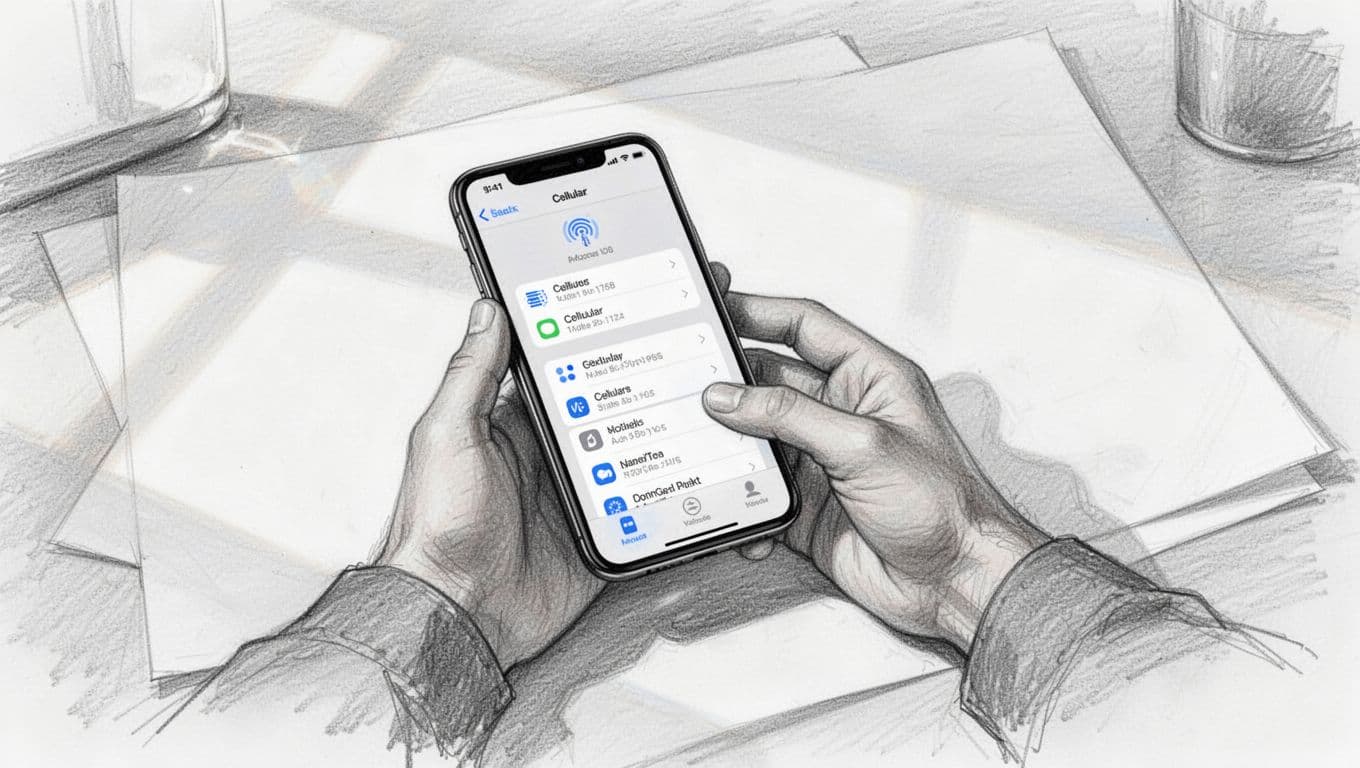
Start by navigating to Settings and tapping on Cellular. Look for the Cellular Data section at the very top. Inside, you will see a list of your available plans. You must place a blue checkmark next to your preferred travel line. If you leave the checkmark on your primary home line while in Paris, the local French tower will not send any data.
It is also helpful to check your line labels in this menu. Your phone might display labels like “Primary,” “Travel,” or “Personal.” Always double-check that your chosen data line holds an active data balance. If you still face issues, explore our guide on fixing eSIM activation problems. Your provider must fully register the plan first.
Toggling Data Roaming and Local Network Permissions
The word “roaming” used to be the stuff of nightmares for a monthly phone bill. For modern travel plans, though, roaming is actually the secret sauce that makes the whole thing work. When you’re using a third-party data plan, your phone is technically roaming onto a local partner network.
If the Roaming toggle is flipped to off, the local cell tower will recognize your phone and show you bars, but it will refuse to share a single kilobyte of data. It’s essentially a polite “handshake” without the exchange of information. You can find this toggle by tapping on your specific eSIM line within the Cellular menu.
| Setting Name | Status for Travel | Purpose |
|---|---|---|
| Data Roaming | ON | Allows connection to local partner towers |
| Low Data Mode | OFF | Ensures apps can refresh and load properly |
| Limit IP Tracking | OPTIONAL | Can sometimes interfere with local network gates |
Enabling this setting tells your phone that it’s okay to use the local infrastructure. Apple provides a great breakdown about cellular data roaming options for those who want to see the technical side of how these handshakes happen.
Disabling the Old Home Line
Sometimes your phone tries to be too smart for its own good by holding onto a weak signal from your home carrier. This happens most often with features like Wi-Fi Calling or when your home SIM is still desperately searching for a signal. The easiest way to stop this conflict is to temporarily put your home line on a “time out.”
Go into your Cellular settings and tap on your Primary or home line. You will see a toggle that says “Turn On This Line.” Flick it to the off position. This forces the device to focus 100% of its energy on the new plan. It’s a great way to fix common eSIM activation errors on iPhone because it removes any competing signals that might be confusing the modem.
Manual APN Entry: The Last Resort
The APN (Access Point Name) is basically the username and password your phone uses to log into the internet. Most modern plans set this automatically, but once in a while, you have to type it in yourself like a secret code. If you have signal but zero data, the APN might be blank or incorrect.
Navigate to Settings -> Cellular -> [Your Plan] -> Cellular Data Network. You’ll see fields for “APN,” “Username,” and “Password.” Your provider usually sends these in a confirmation email or displays them on their website. Type them in exactly as they appear, as even one extra space can keep you offline. This step is the digital equivalent of making sure the key actually fits the lock.
Why Does My iPhone eSIM Have Signal But No Internet Flow?
It’s the classic digital ghost story. You look at the top of your screen and see a healthy row of bars, yet your browser acts like it is trapped in 1995. This happens because those signal bars only measure the strength of the radio waves between your phone and the tower. They don’t account for the software bouncers standing in the way of your actual data packets.
While the hardware is ready to party, your phone’s internal routing might be sending your data into a brick wall. This often happens because of “Ghost Data Plans” where your phone thinks it is connected to a network that hasn’t actually finished checking your ID yet. Let’s unravel the two most common culprits behind this connectivity standoff.
VPNs and Security Apps: The Quiet Data Blockers
Think of your eSIM as a reliable mail carrier and your VPN as an overprotective security guard. Normally, the carrier takes your data and delivers it straight to the web. When you enable a service like NordVPN or iCloud Private Relay, you are essentially telling your iPhone that every single letter must first pass through a specific security checkpoint.
The trouble starts when that checkpoint is closed for lunch. Many VPNs use a “Kill Switch” feature designed to protect your privacy. If the VPN server hiccups, the app tells your phone to stop sending data entirely. You will still see full signal because your phone is talking to the tower, but the software has effectively padlocked the gate. To see if your security apps are being a bit too zealous, try these moves:
- Temporarily toggle off your VPN inside the app settings.
- Disable iCloud Private Relay by going to Settings -> [Your Name] -> iCloud -> Private Relay.
- Check for third-party firewall apps that might be filtering your local traffic.

If your internal bouncer is simply refusing to let data through, you might find that VPNs appear to be blocking internet access because of a missing DNS handshake. Turning them all off for a moment is the fastest way to verify if the “block” is coming from inside the house.
Network Congestion and Roaming Deprioritization
When you are using a travel signal, you are technically a guest on someone else’s playground. Local carriers give their own monthly subscribers the “VIP treatment” on the network. If you are at a crowded stadium or a busy train station, the local tower might let the locals into the “fast lane” while leaving travelers in the digital gutter.
This is known as deprioritization, and it explains why you have four bars of signal but zero speed. The tower knows you are there, but it is making you wait until the paying locals finish their TikTok scrolls. This is especially common with budget travel plans where the fine print mentions “throttled speeds” after a certain amount of usage.
- Move to a less crowded area to see if the tower was just overwhelmed.
- Toggle Airplane Mode on and off to force your phone to hunt for a fresh, less crowded frequency.
- Switch your voice and data settings from 5G to LTE, which can sometimes be less congested in busy city centers.
Understanding these hierarchies helps manage expectations. If you find your current plan is constantly stuck at the back of the line, it might be worth resolving Airalo eSIM internet connection problems by checking if a manual network selection can find a faster local partner. When all else fails and you just need a signal that actually works, you can always Get your free esim now to bypass a congested local provider.
A Rapid Decoder for Your iPhone Status Icons
You look at those tiny symbols in the top corner of your screen like they are ancient hieroglyphics. One minute you see a proud “5G” and the next you are staring at a lonely “3G” while your phone spins its wheels. These icons are your iPhone’s way of whispering its current struggles to you. When the internet stops flowing, these little letters are the first clues in the mystery of why your connection has gone cold.
Understanding the hierarchy of these symbols helps you realize how much muscle your connection actually has. If your screen shows “No Service” or a “Searching” loop, the hardware is completely cut off from the world. However, seeing a symbol like 3G while having full bars is the classic sign of a “zombie” connection. The phone is talking to a tower, but it’s a legacy tower that can’t handle modern data loads.
Interpreting LTE and 3G Symbol Downgrades
Seeing the 3G icon on a modern smartphone is frustrating. It feels like trying to run a marathon through a pool of molasses. This symbol essentially means your phone is struggling to find a modern network band. As a result, it settles for an older, slower frequency just to keep you connected.
Why is Your iPhone Stuck on 3G?
In the current mobile world, 3G is often a ghost of its former self. Many global carriers are actively shutting down these legacy networks. They repurpose these older frequencies to make room for faster 4G and 5G tech. If your eSIM iPhone drops to 3G, the local roaming partner might have limited coverage in your exact location.
When your phone drops from LTE to 3G, it’s often because the local LTE signal is blocked by heavy walls or distance. Because your iPhone is a polite guest on the network, it won’t complain; it will just quietly downgrade your experience. To see exactly how much speed you are losing in this trade-off, you can check out this comprehensive guide on cellular network generations. Generally, LTE offers the snappy performance you expect, while 3G barely manages to load a basic text email.

If you find yourself stuck in 3G purgatory, the fix is usually found in your settings menu. Instead of letting your phone make its own choices, you can manually select a network provider. Head into Settings, then Cellular, and look for Network Selection. Flip the Automatic toggle to off and wait for the list of local carriers to appear. Picking one manually often forces the modem to re-evaluate its life choices and snap back into a faster LTE band.
Often, a quick eSIM network connection troubleshooting session involves simply reminding the phone that 3G is no longer acceptable. If you are traveling and find that the local “partner” network is consistently pushing you onto outdated bands, you might want to Get your free esim now to see if a different roaming partner provides a more modern handshake. Sometimes the hardware just needs a nudge to stop being so lazy and look for a proper 4G or 5G signal.
The Big Reset: How to Safely Flush Your Network Settings
Sometimes, your iPhone just needs a memory wipe for its social life. It’s been talking to too many Wi-Fi routers, Bluetooth speakers, and cell towers, and now it’s confused about who it’s supposed to be dating. A standard restart is like a quick nap; it refreshes the brain but doesn’t solve the deep-rooted drama.
When your data is flatlining despite those beautiful signal bars, a network reset serves as a total social detox for your modem. It clears out every single saved connection, including the glitchy ones that are clogging your internet pipe. It’s a slightly larger hammer than the Airplane Mode toggle, but it’s the most effective way to shake off a stubborn software bug.
The Step-by-Step Guide to a Clean Network Reset
Think of this process as a fresh start for your phone’s communication skills. It doesn’t touch your vacation photos or your carefully curated playlists, but it does wipe the slate clean for everything involving a signal. Because this fixes deep software glitches that a normal restart cannot touch, it’s the gold standard for fixing “Signal but no Internet” ghosts.
- Open your Settings app and tap on General.
- Scroll all the way to the bottom and select Transfer or Reset iPhone.
- Tap on Reset at the bottom of the screen.
- Select Reset Network Settings from the pop-up list.
- Enter your passcode and confirm that you really want to do this.

Your phone will go black and show the Apple logo while it scrubs the connection files. Once it wakes back up, you’ll need to re-enter your Wi-Fi passwords and re-pair your Bluetooth headphones. It’s a small chore, but it’s worth it to see that spinning wheel finally turn into a loaded webpage.
Reset vs. Erase: Don’t Nuking the Wrong Target
There is a massive, terrifying difference between “Reset Network Settings” and “Erase All Content and Settings.” If you pick the latter, you aren’t just fixing your internet; you’re essentially performing a digital lobotomy on your iPhone. Resetting the network only focuses on how to reset iPhone settings to defaults for connections, while erasing content deletes every photo, app, and contact you’ve ever saved.
Most people use the network reset to fix specialized bugs, but if you’re curious about the deeper difference between Reset All Settings vs. Erase All Content, just remember that “Reset” is a haircut while “Erase” is a total identity change. Always double-check which button your thumb is hovering over before you commit.
| Action | What Happens to Photos? | What Happens to Wi-Fi? | Effect on eSIM |
|---|---|---|---|
| Reset Network Settings | Safe and sound | Forgotten/Deleted | Stays active |
| Erase All Content | Gone forever | Gone forever | Can be nuked |
Now, for the most important warning of your digital life: DO NOT DELETE YOUR ESIM PROFILE. When you are clicking around the reset menus, your iPhone might ask if you want to remove your cellular plans. If you say yes, you are essentially burning your one-way ticket home.
Deleting that profile is permanent, and you’ll likely have to pay for a new one or wait on hold with support for hours. Keep your eSIM profile tucked away safely like a passport. If your current plan is truly dead and you need a way out, you can Get your free esim now rather than trying to resurrect a deleted profile. Always keep the line active, even if you are flushing the settings around it.
Conclusion
Seeing a row of signal bars on your iPhone when the internet refuses to budge is a classic case of technical miscommunication. It simply means the hardware is chatting with a tower, but a digital clog in your settings or a local network rule is blocking the data flow. Because most of these issues live in the software, you can usually clear the path by checking your roaming toggles or refreshing your network profile.
Your tech should work for you without turning into a full-time job. Whether you are navigating a new city or just checking email from a campsite, a few quick taps are usually enough to get things moving. If your current provider keeps letting you down, you can Get your free esim now to see if a fresh connection solves the problem for good.
Take a breath and remember that even the smartest devices get seasonal allergies. Most of the time, the fix is sitting right there in your cellular menu waiting for you to find it. Stay connected and keep exploring.
This post may contain affiliate links. If you make a purchase through these links, I may earn a small commission at no extra cost to you.